

11 Oct Moving WordPress website from one hosting provider to another
This is a common problem among the WordPress developer community and web design company in gulf and most guides or walkthroughs out there are not explicit enough. You will need to move a website from one hosting provider to another in the following circumstances:
- You have unprecedented traffic on your website, and your current hosting plan/ provider is incapable of meeting the load
- You have made a demo website on a particular domain in a particular hosting plan, and now that your demo is ready, you want to move it to the real domain name in a new hosting provider Performance issues with your current hosting provider
- Your current hosting plan/ pricing is not good value for money
Possible scenarios
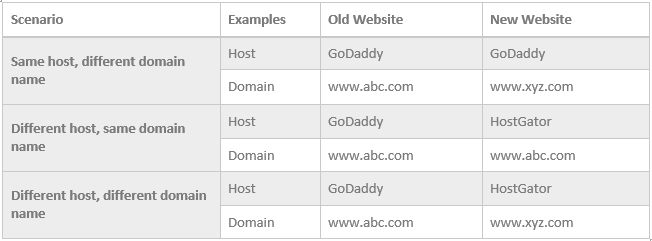
Listed above are the possible movements that can be done for your WordPress website. This guide is going to focus on the 2nd and 3rd scenarios, which are usually more challenging than the 1st.
Creating a backup of your WordPress site before starting
- Manual
Moving WordPress website from one hosting provider to another
This requires a combination of downloading your website files from an FTP client like FileZilla, and downloading an SQL database from phpMyAdmin in your hosting CPanel.
To download your websites files, connect to an FTP client (Let us assume FileZilla), and download the website root folder to your computer. Your root folder is essentially the WordPress installation folder that contains files such as wp-config.php and wp-login.php. We will not get into the details here, but you can have a look at this link (https://www.tipsandtricks-hq.com/using-filezilla-ftp-client-for-your-wordpress-site-6566) if you require an in-depth walkthrough for downloading the files.
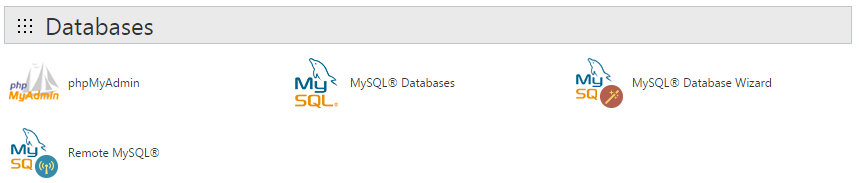
Once your files are downloaded, you need to backup your SQL database. Login to your CPanel (where your website is installed), and look for phpMyAdmin under Database.

Click on phpMyAdmin, and a new tab will open. On the left, you will find a column with a list of table names. Choose the table name which corresponds to your website, and click on Export.
Moving WordPress website from one hosting provider to another
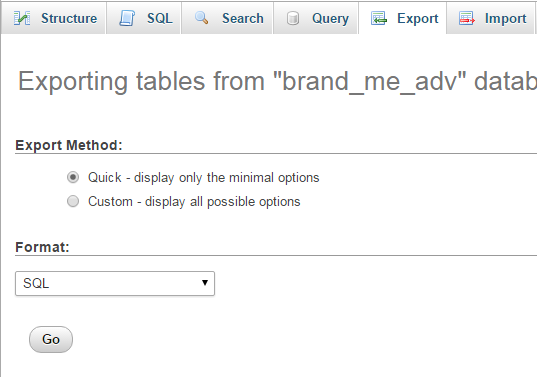
Select the settings shown above, and click on Go. That’s all, your database file is downloaded. Keep both the WordPress files and SQL database safely backed up in one location.
- Automatic (Plugin)
This is a one-step method to back up your complete WordPress website. On your WordPress admin dashboard, download and install the following plugin:
BackUpWordPress (https://wordpress.org/plugins/backupwordpress/)
Run a backup, and you will get to download one single .zip file, which will contain the WordPress files as well as the SQL database.
Steps to move the WordPress website from one hosting to another
Moving WordPress website from one hosting provider to another
Now that your files are backed up, we can begin moving the website. Make sure you follow each and every step.
That is all, your new website should be fully set up now. Feel free to get help at any point of time from the best digital marketing agency Dubai, or comment below with your query.
Step 1
Copy your WordPress files that you backed up in the previous step to the new hosting providers root folder (Do not copy the SQL database files).
You will have to copy all the files that are there in the main folder (consisting of wp-config.php and wp-login.php). Again, use an FTP client like FileZilla.
Step 2
Go to your new hosting providers CPanel, click on MySQL Databases, and then create a new database.

Give the database any name you like, and click on Create Database.

I have used the name “TutorialDB”. Your database will be listed like this under Current Databases:

Moving WordPress website from one hosting provider to another
Now, there is no privileged user for this DB, so we shall add one now.
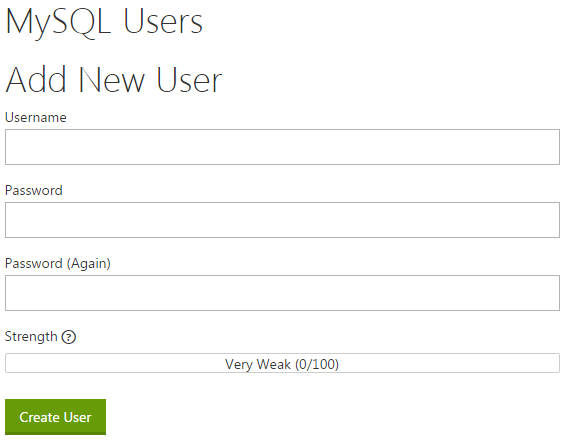
Again, use any username and password, and click on Create User.
Next, add this new user to the new database you just created (I created a user called TestUsername).
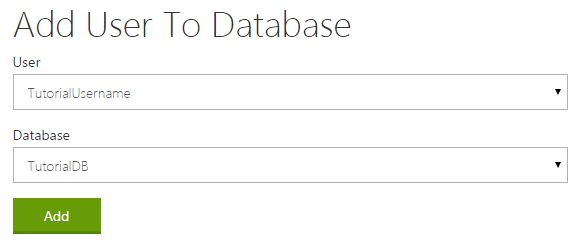
Note down the username and password you just used, since it will come in use later on in this walkthrough.
Moving WordPress website from one hosting provider to another
Step 3
Your next step is to import the old SQL database file, into the new database you created in Step 2.
Go to phpMyAdmin in your new hosting CPanel.
Look for the database name you just created on the left (In my case, I am looking for the database called “TutorialDB”). Click on Import.

Make sure you don’t change any setting on this page.
Moving WordPress website from one hosting provider to another
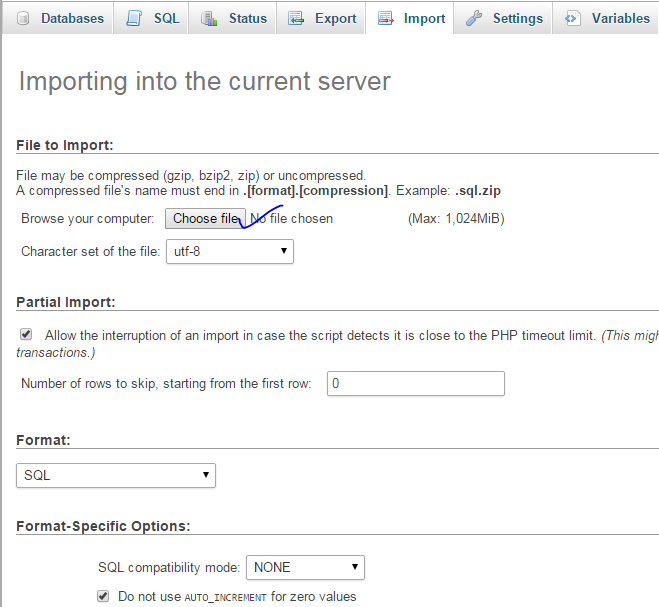
Click on choose file, and select the SQL file which you downloaded while backing up the old website. Don’t change any other setting, and click on Go.
That is all, your old database is now imported into your new one.
Step 4
On phpMyAdmin, again click on your new database name, and then click on Structure.
Moving WordPress website from one hosting provider to another
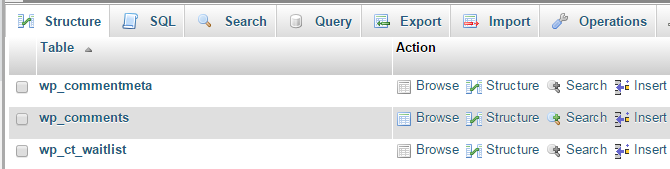
You will find a list of table below, all prefixed with a “wp_”. Look for a table called “wp_options” and look for the parameters “home” and “siteurl”.

Click on Edit, and change the “option_value” fields to the new domain name, that is www.xyz.com. Click on Go.
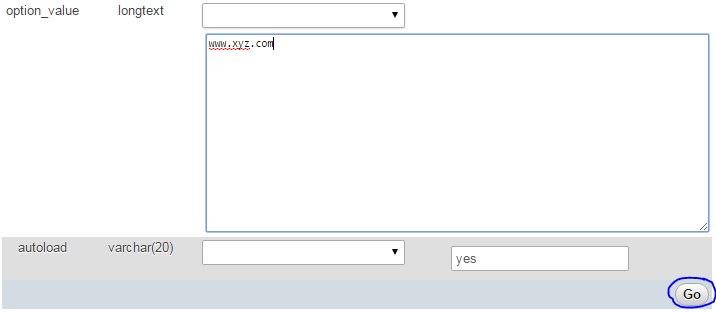
Do this for both “home” and “siteurl”.
Step 5
The next step is crucial, and requires you to be careful.
Go to your file manager in new hosting CPanel, and look for the file wp-config.php in your main WordPress installation folder.
Moving WordPress website from one hosting provider to another
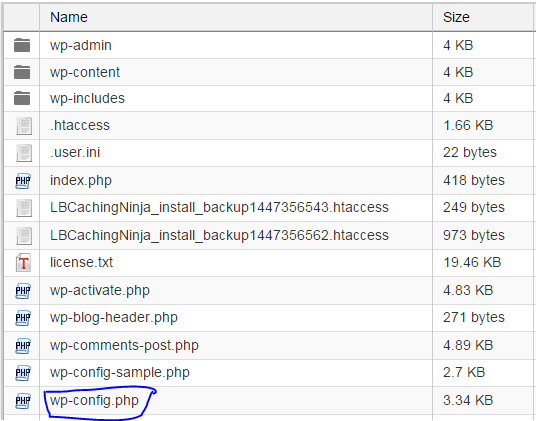
Right click on this file, and select “Edit”. A new tab will open with the code for this file.
You will need to change the following 3 parameters:
- DB_NAME
- DB_USER
- DB_PASSWORD
Moving WordPress website from one hosting provider to another
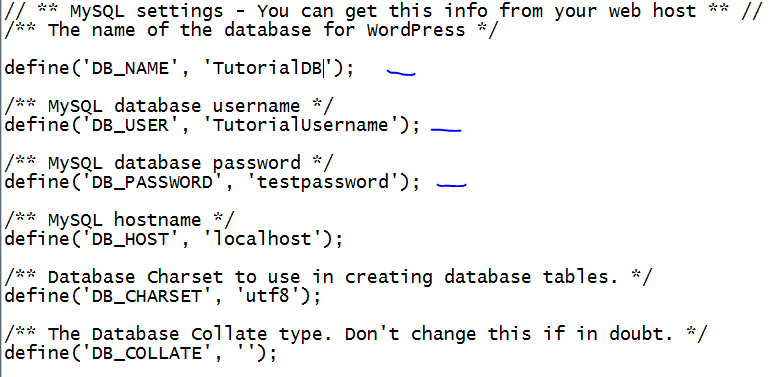
Change the values to the database name, username and password you created in Step 2. In my case, it is TutorialDB, TutorialUsername and testpassowrd, in that order.
Save the file and close the code editor.
Step 6
We are almost there, good job. Now, open your new (or old) domain WordPress admin (www.xyz.com/wp-admin) in a web browser.
Use the same login and password credentials that you were using for your website on the previous hosting provider.
Step 7
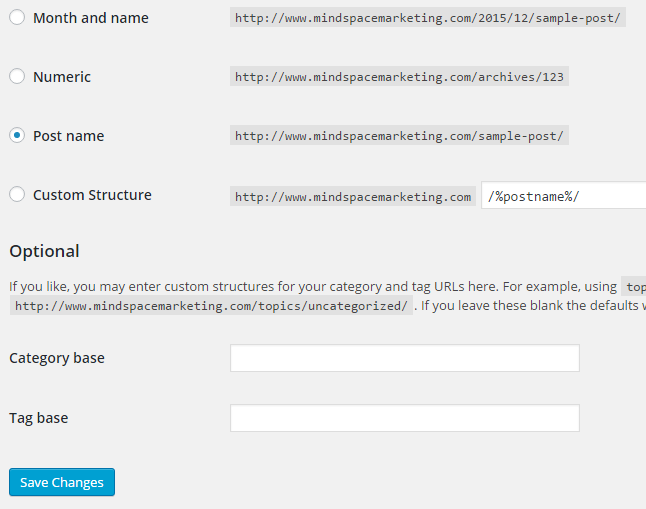
On the WordPress admin dashboard, go to Setting-> Permalinks, select Post Name option and click on Save Changes.
Moving WordPress website from one hosting provider to another
Step 8
Open the new website, and test all pages and links. Test the menu items too. In all probability, these links will still be pointing to the old website.
You will have to change the menu links manually, so go ahead with that.
Once the menu is updated, download the plugin called Velvet Blues (https://wordpress.org/plugins/velvet-blues-update-urls/)
Install and activate the plugin, and input your old website and new website details here. Choose the settings shown in image below.
Moving WordPress website from one hosting provider to another

Click on Update URLs Now, and you are good to go.
Step 9
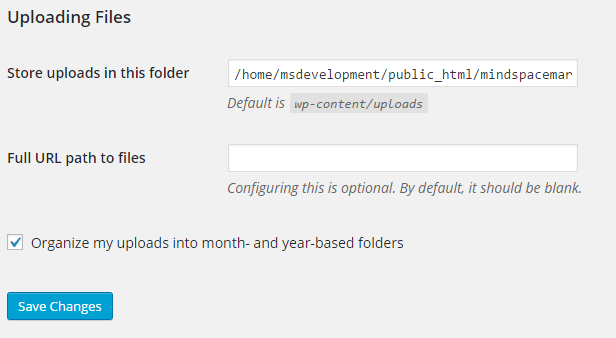
One final step which is almost always missed out on, is to change the Media upload path.
Go to Settings-> Media and edit the store uploads in this folder field. Find out your new folder location.
Moving WordPress website from one hosting provider to another
That is all, your new website should be fully set up now. Feel free to get help at any point of time, and comment below with your query.
Case Studies

No Comments